Videoconferencing is a great way to communicate with others when we are not in the same location. Unfortunately, not everyone has production-level equipment at home, and this may lead to un-appealing visuals.
In this article/video I will share a few tips that will help you make the most out of your Zoom video calls.

Lighting
First of all, let’s start with lighting. Even subtle differences in lighting can drastically improve image quality.

If you do not have lighting equipment at home or in the office, my recommendation is to place yourself in front of a window so that the light coming in from the outside bathes your face and body with soft light.
Watch the video in this article to see a before/after example of lighting.
Tip: If the sun is hitting the window directly, you may change your position over to the side of the window, so that you are illuminated, but not blinded by the harsh sunlight.
Webcam
Your computer should have a webcam if it is relatively recent, but it may still be giving you a less-than-ideal image. If you feel your camera’s image could be better (wider angle, crisper image, faster motion, etc.), you can use an external USB Webcam to solve the issue.

External Webcams typically have much higher quality than what their internal counterparts provide, and they are not expensive (compared to an actual camera).
In this article’s video, you can clearly see the difference between an internal and an external webcam.
Some examples of webcams are:
Note: I have included links to Google searches for these so that you can see a price comparison on the right (on Desktop). As many retailers are sold out at the moment, beware of price gouging!
Virtual Background
Sometimes our room/living room/kitchen might not be the ideal background for a business setting. For those scenarios where you need to have a call and cannot do much about your background, here’s a quick tip:
Virtual Backgrounds!
Zoom allows you to use Virtual Backgrounds during your calls, and you don’t even need a Green Screen. I recommend trying to have a uniform color behind you, like a white wall, but it is not necessary.
In the video, I explain how to enable Virtual Backgrounds directly on Zoom, but here’s a quick primer:
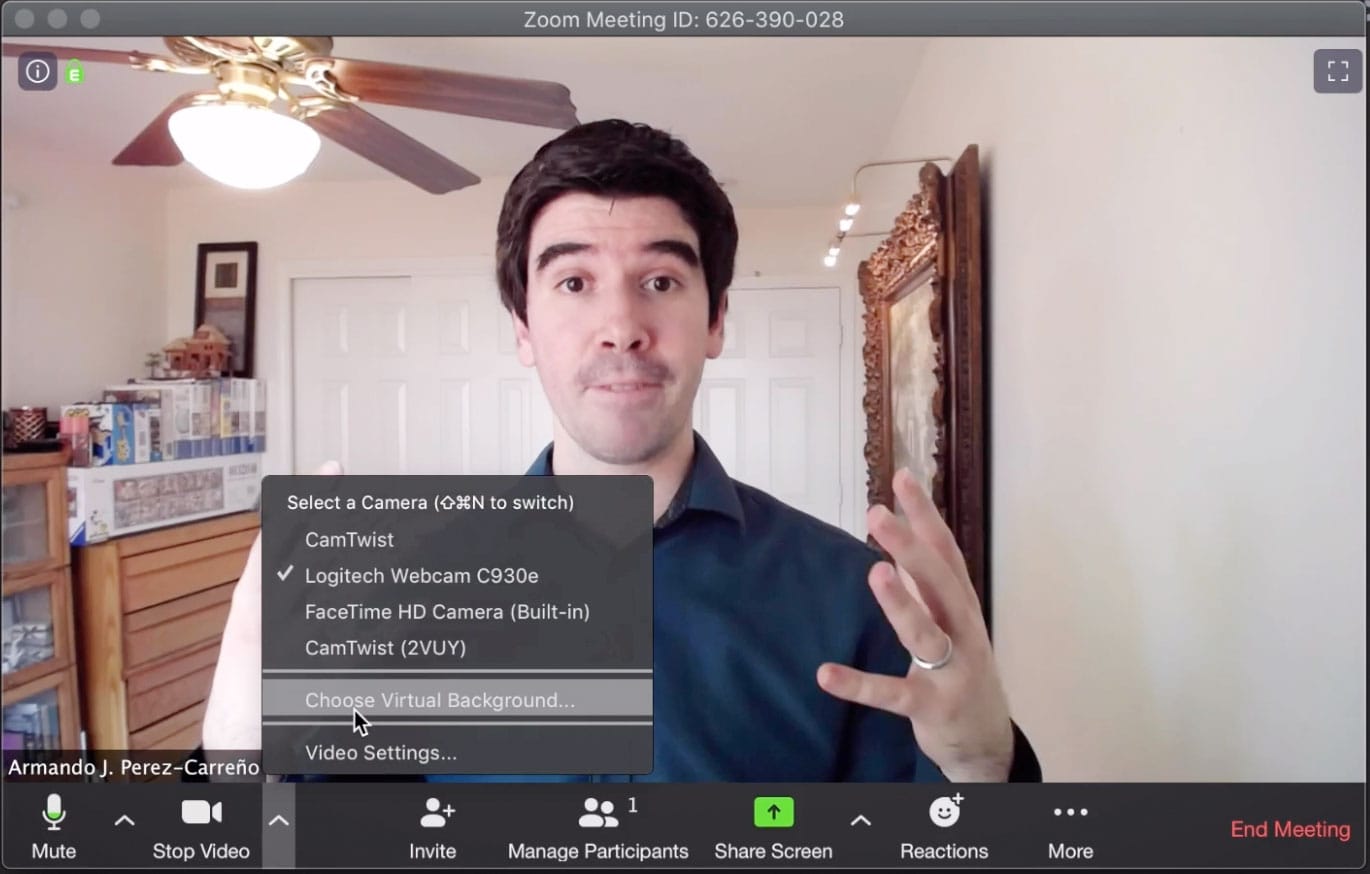
- During a call, click on the upward-pointing arrow that appears next to the camera icon in your Zoom window.
- Select the option called “Choose Virtual Background…”
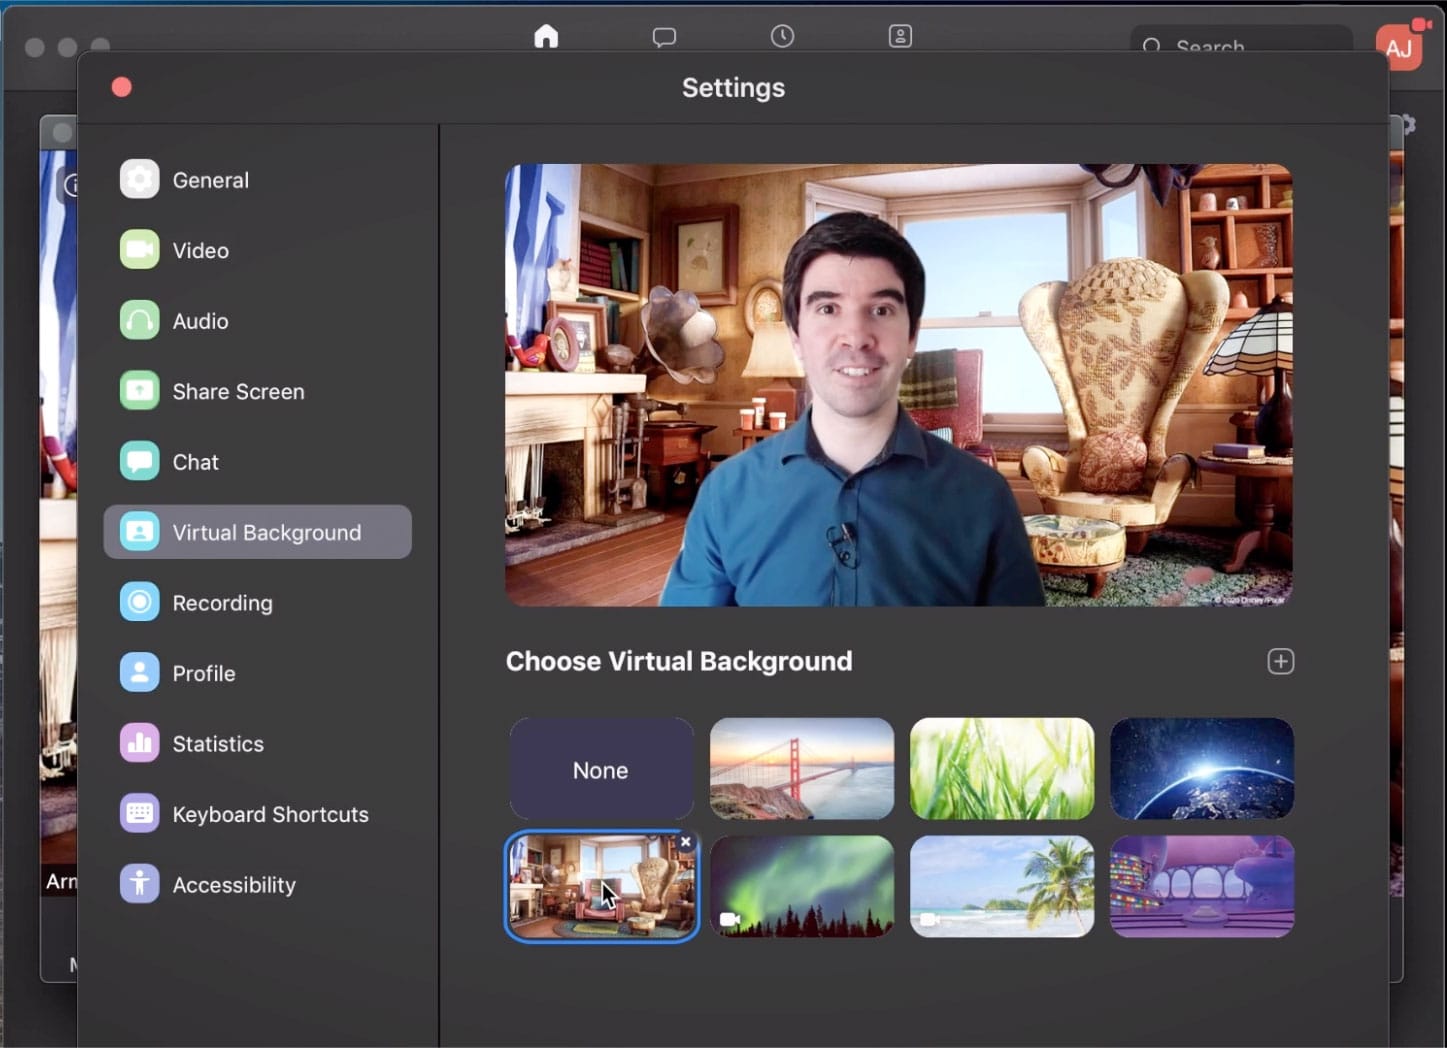
- Click on any of the images that are provided by Zoom to immediately activate your Virtual Background.
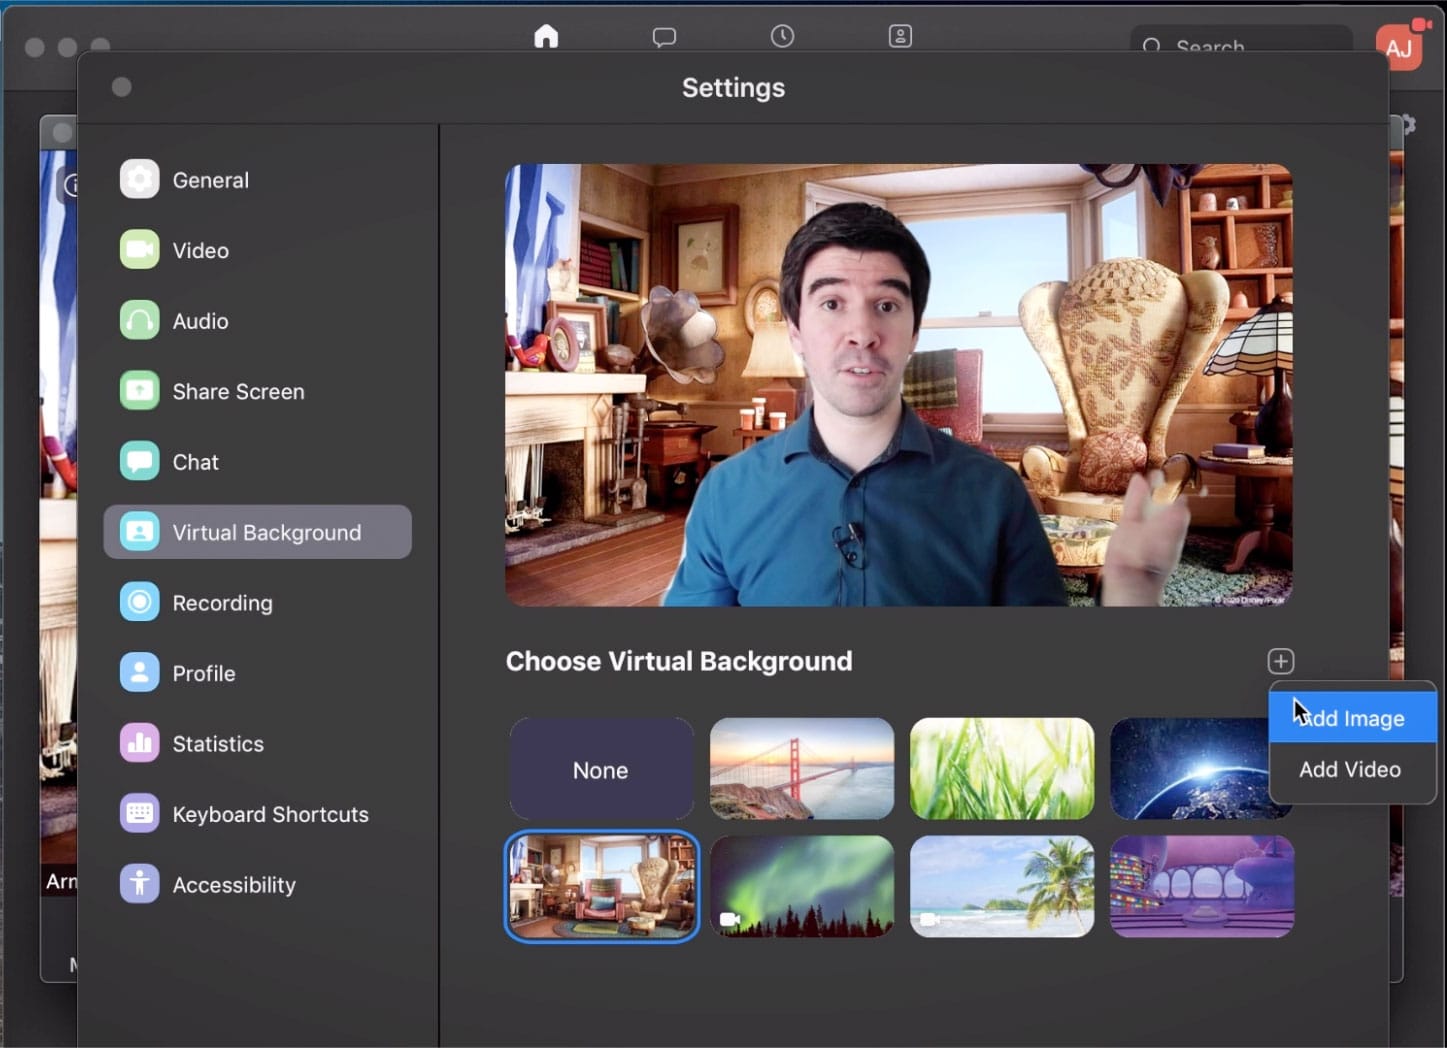
- You may add new images/videos by using the “plus” icon that appears right above the available backgrounds.
- Exit out of the Settings window and your background is ready to be used as soon as you “Start Video”.
For the custom backgrounds shown in the video, we can thank Pixar for sharing some fantastic designs. Get your own here:
Microphone
Sound is probably the most influential factor in your meeting’s success. If people can’t understand what you are saying, your message is lost.
If there are multiple sounds going off around you (dogs, kids, lawnmowers, etc.), your audience will quickly be distracted.
You need to pay attention to sound. Not only the sound that you hear but, more importantly, the sound that you are broadcasting to your attendees.
In the video, I show the difference between not doing anything and applying some of these tips. The outcome will surprise you!
To fix audio issues, there are two quick things you can do:
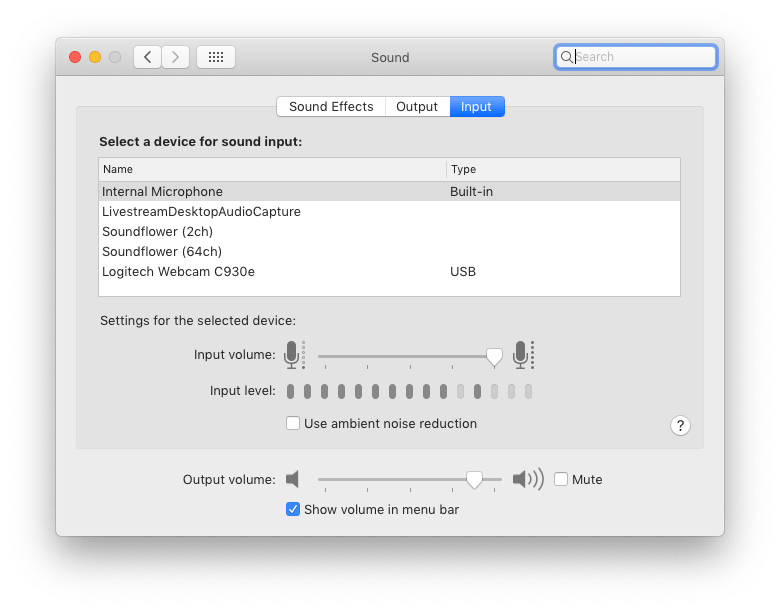
- Activate “ambient noise reduction” either on your computer or on your headset/headphones (if applicable).
- Use an external microphone instead of your computer’s internal microphone.
On a Mac, which is what I have here, you can easily enable ambient noise reduction in the System Preferences:
For external microphones, you have plenty of options. It really comes down to how you want to look, and your budget:
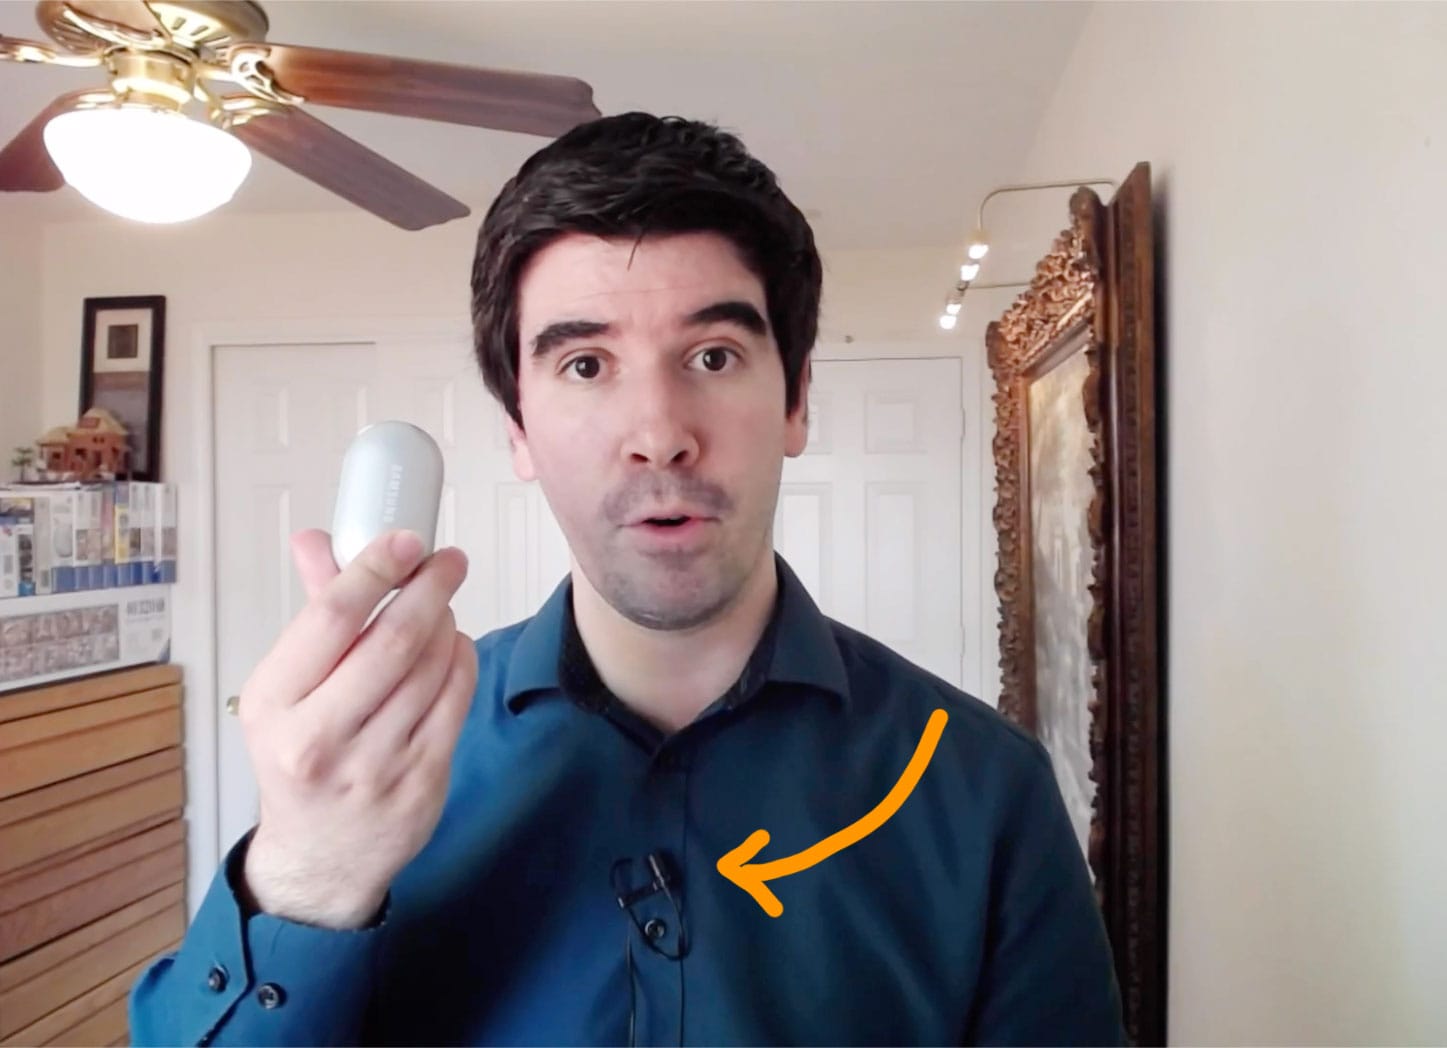
- An inexpensive Lavalier microphone like the one I use in the video (Polsen MO-IDL1)
- A headset with a microphone (like the ones you see in call centers)
- Your mobile phone’s included earphones (they usually have a microphone included in the cable)
- Add a microphone to your existing headphones. I use the V-MODA BoomPro which can adapt to many headphones, though the ModMic series might be a better option for those whose headphones don’t have a detachable cable.
- Your existing Bluetooth headphones (I use the Samsung Galaxy Buds, but many people swear by their AirPods). Or, if you already have something like the Sony WH1000XM3, you can use those!
Conclusion
As you can see from these quick tips, you can get a much better image and sound quality for your video calls without having to spend a lot of money (or anything at all).
The next time you schedule a meeting over Zoom you too can be prepared!
If you have any questions/comments, feel free to add them below and I’ll be glad to respond.


